Before you can work with SQL, you will need access to a Database Management System (DBMS). While SQL is a standard across many different DBMSs, we will focus on PostgreSQL, an open source, enterprise class DBMS with strong support for geospatial data.
Installing PostgreSQL
Note: If you are installing the database on a different computer from the one you will be using as a client, you will need to perform additional steps. You will need to modify some settings in pg_hba.conf before your can use your database. The configuration of pg_hba.conf is entirely dependent on your network and needs. If you are using PostgreSQL server and a client (pgAdmin, QGIS, ArcGIS) on the same computer, you should not need to change the default settings in PostgreSQL’s pg_hba.conf file. You should not need to perform these steps if using the PostgreSQL server and client on the same computer.
Installing pgAdmin
pgAdmin installation is straightforward under both Windows and macOS. Download pgAdmin 4 for your operating system. Remember, if on Windows, pgAdmin may already be installed when using the EnterpriseDB installer.
Connecting to a PostgreSQL Server
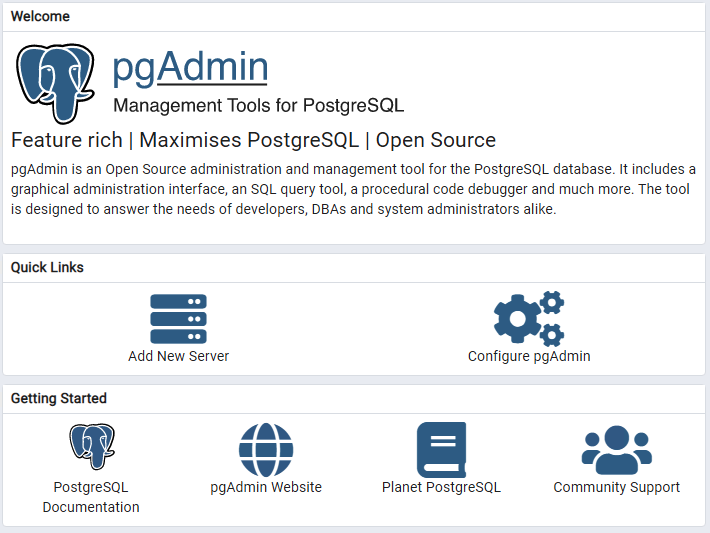
When installed through the EnterpriseDB package, pgAdmin should be pre-configured with a connection to your local database.
If a connection was not made to your local PostgreSQL database upon creation of pgAdmin, you will need to create the connection. Choose “Add New Server” from the pgAdmin home screen.
You can use “localhost” to refer to your current computer. The default port for PostgreSQL is 5432.
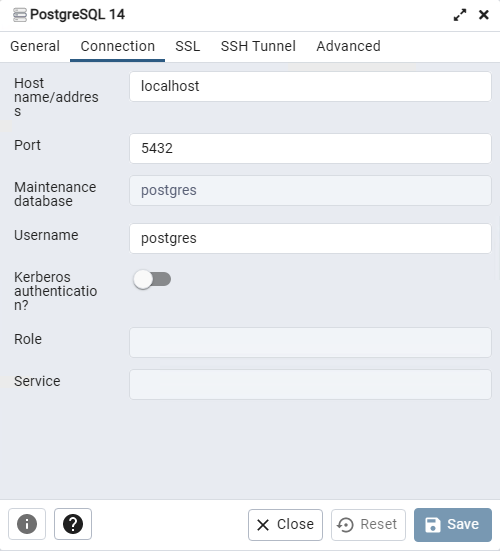
If you are going to connect to a remote database, you will need to provide that information through this same operation. pgAdmin will allow you connect to multiple servers and also supports SSH tunneling, if your server is behind a firewall or otherwise inaccessible.
Loading the Workshop Data
Download the Workshop Data File to your workstation. (If your database client and server are on separate computers, download to your client.)
Using pgAdmin to load data
Before you can load your data, you will need to create a new database for the workshop data to reside. To issue commands to a PostgreSQL database server, you will need to connect to a database hosted within. The postgres database serves as this special-purpose or maintenance database. It is good practice to leave this database empty. We will create a new database on the server to store the workshop data.
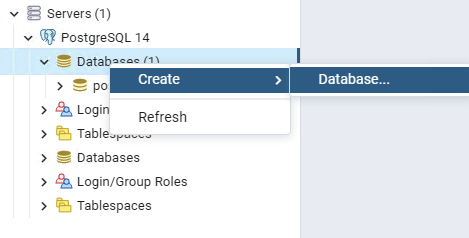
Right click on “Databases” under your database server and select New Database.
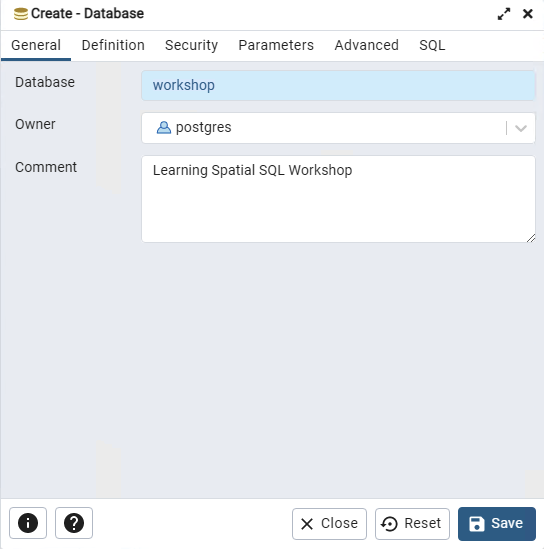
While the databases can be customized, we will accept the defaults. Simply name this new database “workshop” and click OK. You can provide a comment, if desired. As your databases grow, comments will become helpful. You can comment on databases, schemas, tables, columns, and many more objects.
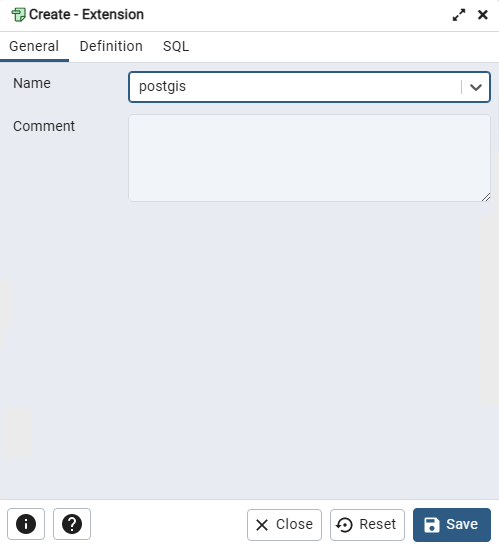
Next, click on your new workshop database to connect to it. Then, right click on the workshop database to create a new extension. PostGIS is included as an extension to the PostgreSQL database.
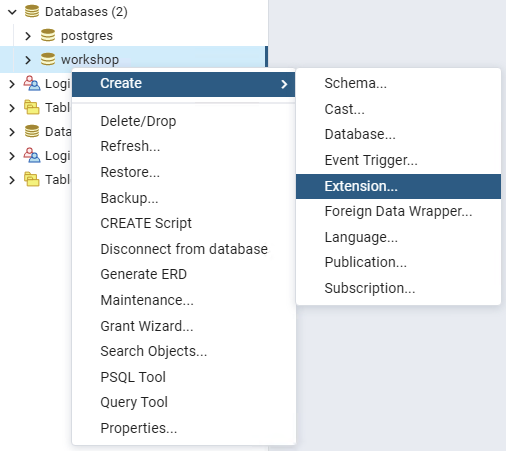
As the PostGIS extension is already installed in the database server, adding it to your specific “workshop” database is as simple as creating a new extension called “postgis”.
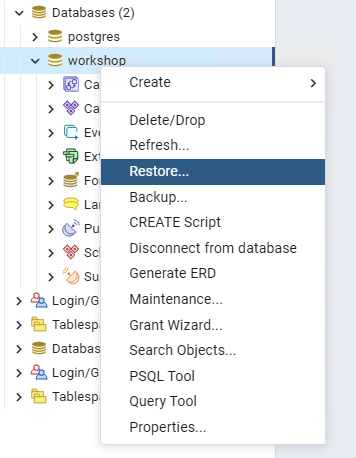
Once the PostGIS extension is created, we can then load the Workshop Data file. Right-click on your workshop database and select Restore.
The Restore interface has several sections with multiple options. Under the first tab, specify the location of the Workshop Data file. The data file is in the custom data format.
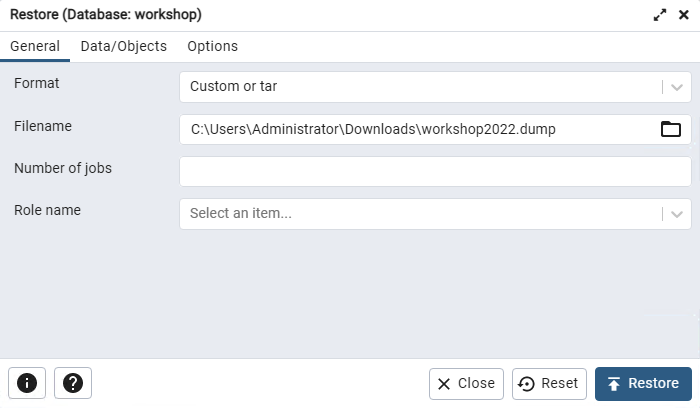
The defaults for the remaining options are acceptable, however you can review them as they may be helpful in the future. In some cases, it is beneficial to ignore the owner, privilege, and tablespace settings in the backup file. While database exports do not include the user account data, the exported objects may retain information about the account that created them. This information can be safely discarded – if ownership or permissions are set for a user that does not exist in this database system, the import will fail.
On “Restore Options #2” make sure that “Verbose messages” is checked. In case of an error, this will help you identify issues with the import.
Once those settings are defined, click the “Restore” button. You should then see new tables in your Public schema.

You are now ready to work with these spatial tables.
Using the command line to load data
Navigate to the location of the downloaded data file. Provided pg_restore is in your path, you should be able to load the file like so:
$ psql
# create database workshop;
# \c workshop
# create extension postgis;
# \q
$ pg_restore -Fc -d workshop workshop.backup
If you are more familiar with shell, you might want to look into how the psql console works and how it can integrate into your shell environment.